This guide will cover the settings that you will need to enable in order to score Relay Teams, and assumes that you already have Divisions set up.
Do not confuse relay teams with traditional teams. In Team Relay, multiple participants each compete in a segment of the race. In traditional teams, all team members complete the entire race. See Teams for an explanation of traditional teams.
When a division is designated as a Team Relay Division, all participating in that division must belong to a team. A relay team is different from teams set up directly from the Tailor pull-down menu in that relay team members only participate in a portion of the entire race distance. The segments of the race that each team member participates in is not predetermined. The person who crosses the finish line determines the finish place for the whole team. All team members are shown on the pre-registration and results reports.
As far as the system is concerned, a relay team is treated like an individual participant is in non-team relay divisions. You set up a team by adding a person to the team relay division through Update Participant Data. If you have team captains, that is the person you would want to initially set up in this division. As a part of the Add Participant process, you will be prompted to add all team members. When results are processed, processing a finish place for one team participant, constitutes the finish place for the entire team. If you try to assign a finish place for a second person on the same team, you will get an error message. On the results reports, all team members are shown for each team that has a posted finish place.
Getting Started
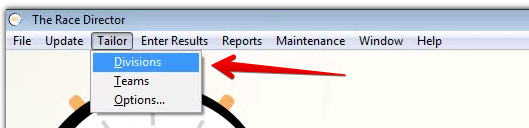
You must have a separate Division created for Relay Teams, The Race Director only allows a Division to be all Team Relay, or all Individuals when it comes to Divisions. First, navigate to Tailor > Divisions and select your division that you have designated for Relay Teams.
Creating a Team Relay Division
Click “Edit” and select the “Team Relay Division” checkbox, then click on the “Settings” box to the right to adjust the settings of this Team Relay Division
Defining the Team Relay Division’s Settings
On the Settings menu, you’ll need to define the parameters of the Relay Teams within this Division.
There are often times where you may want to have separate Divisions for different scoring scenarios, for example you may want a division for All-Male Teams, a division for All-Female Teams, and a division for Co-Ed teams. In addition, you may have separate categories for 2-Person Teams vs. 3-Person Teams. If this is the case, you would need to set up all different combinations of these as a separate division if they need to be broken out for awards.
Team Age Groups are assigned by either the Low Age or Average Age. The Low Age setting is most common, and it means that the Relay Team’s age is determined by the age of the youngest member. The Average Age setting calculates the average age of all members and places teams into Age Groups based on that. If you do decide to assign Age Groups, remember that you’ll still need to define them in the Update Age Groups dialog.
Remember that you’ll need to check the “Team Relay Division” and define the parameters in the “Settings” menu for each Team Relay Division that you have set up.
To learn more about any of these settings, see the Help section by clicking the link at the bottom left corner of the dialog.
Adding Participants to a Relay Team
Participant entry is different for adding to a relay team, because The Race Director sees each relay team as a single participant when it comes to scoring. The way that Race Director handles Relay Team members is by adding in “sub-participants” to a Relay Team, with the data from the first person being entered in held as the team “captain”.
Manual Entry
When adding in participant data for a Relay Team Division, you’ll notice that a few new fields appear at the bottom of the Update > Participants dialog. These are the additional fields to add in team members. You’ll also notice that there is a new field for Relay Team Name which can be substituted for the team captain’s name on results reports.
Importing From a Spreadsheet
If you need to import a number of Team Relay entries into Race Director, you’ll need to make sure that they are formatted exactly as explained here:
-
Each team relay participant must be on a separate row in the imported file with a division number corresponding to a team relay division.
-
All of the records in the import file related to a single team must be consecutive.
-
The bib number must be a selected column in the imported file. You can not let the import process assign the bib number for relay teams.
-
If you have the bib number setting as "unique bib numbers" for the team relay division, the Relay Team Name is referenced to determine how rows in the imported file are grouped into relay teams.
-
If you have the bib number setting as "same bib number" for the team relay division, the Bib Number is referenced to determine how rows in the imported file are grouped into relay teams.
-
Important - Be sure to import the field Relay Team Name NOT the field Team Name. Team Name is used for cross country style teams.
-
Adding to existing teams - it is possible to add additional team relay members to an existing team. This is so you can fill teams where the maximum number of participants is not yet set. The import process will never insert more team members on a relay team than are allowed by the "Maximum Allowed" setting for the team relay division.
Importing From an Online Source
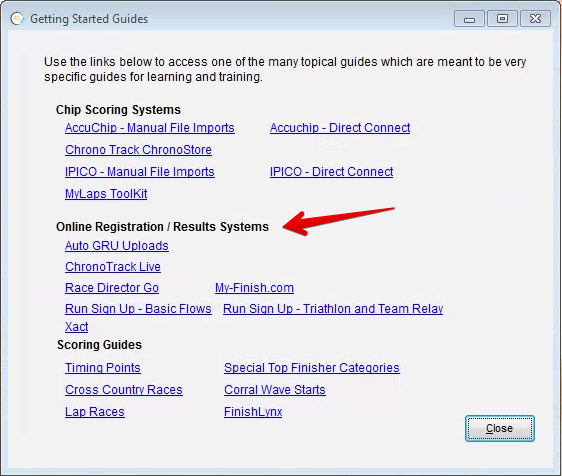
If you are importing from an online registration provider that The Race Director is integrated with, take a look at the getting started guides found in Help > Getting Started
If you are still having difficulty with your Relay Team setup, send us an email at support@theracedirector.com and we’ll be more than happy to walk you through any problems that you are having.